
LIFESTYLE
Flush Mount vs Undermount Sink: How to Choose the Right Mount
Flush mount vs undermount sink is a rim set level with the counter, or a bowl hung under a stone cut. Here is which edge fits your counter and the cut.

You are weighing a flush mount vs undermount sink, and the quote in your hand uses the word flush. That word covers two different edges, and picking the wrong one changes the cut in your counter. A flush mount sets the top of the rim level with the counter surface. An undermount is clamped underneath, and the stone edge above the bowl is a separate choice called the reveal.
Name the edge you want before the slab is cut. The level rim is a flush-mount job, and the installer routes a groove so that rim can sit down into the counter. The hanging bowl is an undermount. When a shop calls that undermount flush, ask whether the stone edge lines up with the inside of the bowl. That cut is a zero reveal, and it is a different line on the saw than a rim brought up to counter height.
This guide covers how each install sits, the three undermount reveals, which counters can hold them, how crumbs and water move at the seam, and what to settle before anyone cuts.
Where the Rim Meets the Stone
A kitchen quote often lists three installs, and only two of them are the pair in the title. The third, a drop-in, is the one that still fits when the counter cannot take a polished hole. Reading all three keeps a flush line on an estimate from being treated as a drop-in with a low lip.
THREE WAYS A SINK MEETS THE COUNTER
- Flush mount: The rim finishes level with the counter, with no lip standing above the stone.
- Undermount: The bowl is clipped under the counter, and the polished stone edge is what you see from above.
- Drop-in: A raised rim rests on top of the counter and seals against that top face, which is also called a top-mount or a self-rimming sink.
Blanco’s guide to sink installation types puts the undermount below the surface, clamped from underneath, on a counter whose cut edge can be finished rather than left rough. Quartz, granite, and marble are the stones named there for a polished edge. The same guide sends a drop-in to counters that cannot take that edge, and it names laminate as the clear case.
Clips and silicone do different jobs. The clips carry the weight of the bowl. The silicone keeps water from walking along the joint into the cabinet. Blanco’s drop-in sheet puts swelling of the counter edge on a seal that was skipped, so a rim that only looks tight is not a finished install.
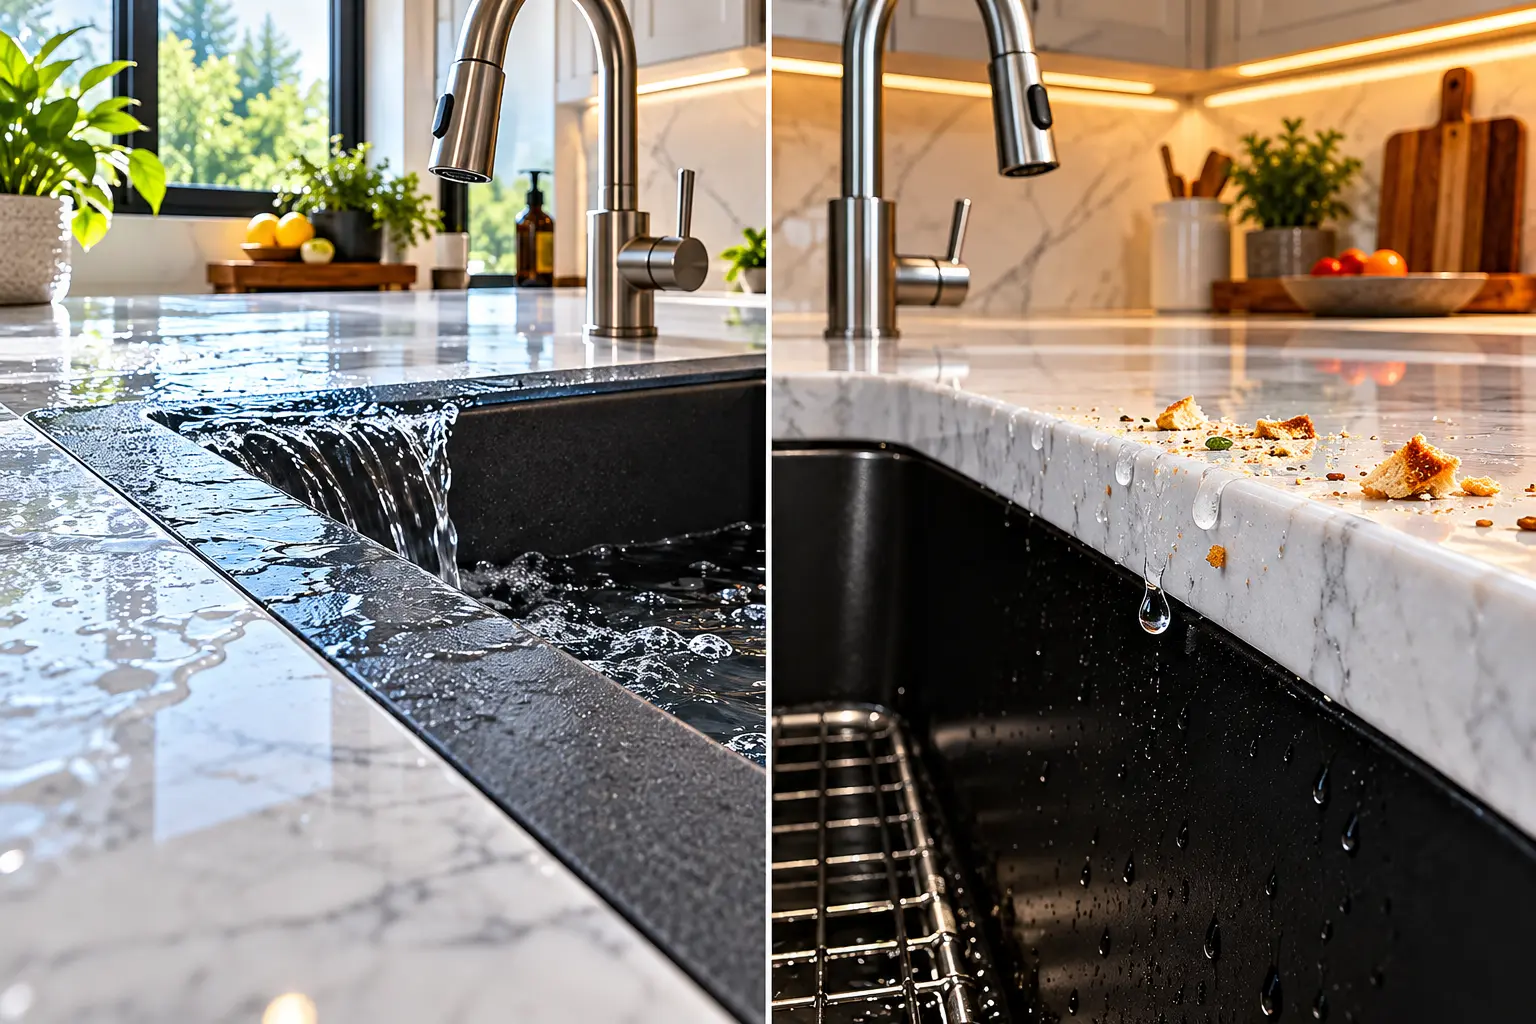
A Flush Mount Groove in the Slab
A flush mount is a height match between the rim and the finished top. The shop routes a groove, sometimes called a rabbet, so the rim can drop into the slab instead of sitting on it or hiding under it. On Kohler’s flush-mount installation sheet, that groove is cut as deep as the rim or a little deeper, and the rim is set slightly below the finished surface so the joint can be brought up level.
WHAT THE FLUSH-MOUNT CUT INCLUDES
- The groove: The slab is marked from the sink’s flush-mount line and routed to the rim thickness, or slightly past it.
- The dry fit: The sink goes into the opening, and the rim is checked so it sits slightly below the finished top.
- The seal: Silicone goes into the groove and around the rim, and the excess is wiped while it is still wet.
- The cure: That sheet leaves the sealant to cure for 24 hours before the sink goes back into daily use.
The same sheet warns that the edges are sharp and the sink is heavy, and it says not to run wiring under the bowl. You are paying for a groove, a rim that sits a hair low, and a joint filled level with the stone. A jigsaw hole in a finished laminate top is a different job, and it will not give you this plane.
Blanco’s film of a VINTERA set as a flush mount shows the result that groove is chasing, a rim brought level with the worktop and a band of sink color still visible around the bowl.
If the quote says flush and nobody has mentioned a groove, ask for a side sketch before you accept the price. Rim height and stone edge are two lines. A single word on the estimate has not drawn either of them.
Undermount Reveal Choices on the Bowl
An undermount look is set by the reveal, the horizontal gap between the cut edge of the stone and the inside of the bowl. The template that ships with most Blanco undermount sinks is drawn for a 1/8 inch reveal around the bowl. That is a partial reveal on Blanco’s installation page and a positive reveal in the installation notes. Both names mean the stone stops short and a narrow band of rim stays visible.
Those reveal choices apply to stainless undermounts and to SILGRANIT, and the look has to be chosen before the install starts. Blanco’s undermount cutout template calls the 1/8 inch ledge the easy-cleaning layout. The note tells the fabricator to speak with you if you want the sink flush mounted, or given a negative reveal, instead of that ledge. The installation notes put a finished rim of about 1 inch on these undermounts, which is the band the stone is lining up against.
| Reveal | Where the stone stops | What you live with |
|---|---|---|
| Partial, also called positive | 1/8 inch back from the bowl, on a finished rim about 1 inch wide | The default template cut, with a narrow rim you can wipe |
| Zero | The stone edge meets the bowl | Little or none of the rim shows from above |
| Negative | The stone laps the rim by 1/8 inch | The rim is hidden, and a board or colander can catch the lip |
Negative reveal is the cut to test with the real accessories before the stone is sawn. The installation notes tell you to make sure a colander or a cutting board will still fit when the stone laps the rim. A board sized to the bare bowl opening hits that lip and sits proud of the counter.
The matching Blanco film shows the same VINTERA line clipped up from below as an undermount, which is how most apron sinks are still set.
Why Do Zero Reveal and Flush Mount Get Mixed Up?
Zero reveal and flush mount pick up the same nickname in shop talk, and they describe different edges. A zero reveal is what you see looking down: the stone edge and the inside of the bowl line up, on a sink that is still hanging under the counter. A flush mount is what you see from the side: the top of the rim is level with the counter, and a band of the sink is often still in view.
Blanco’s own pages use both meanings. The installation guide calls a zero reveal a countertop flush with the sink bowls. The cutout template, the one that leaves the cleaning ledge, tells the shop to ask you about a flush mounted sink if you do not want that ledge. On the VINTERA farmhouse sinks, flushmount means the other result, a visible rim of SILGRANIT color sitting flush with the countertop, on a model that can also be clipped underneath.
Ask for a side sketch with two labels, rim height and stone edge. If both labels come back as flush, you still have two cuts to price. A routed groove is not the same labor as sliding the stone edge by a fraction of an inch, and the sink you already bought may be built for only one of them.
Flush Mount vs Undermount Sink by Counter Material
The counter decides which of these installs is even available. A polished cut edge is what an undermount leaves on display. A routed groove is what a flush mount needs, because the slab has to hold a rim at a set depth. A drop-in needs a hole and a rim that can seal on the top face.
COUNTERS THAT MATCH EACH MOUNT
- Quartz, granite, and marble: These stones take a polished cut edge, which an undermount leaves showing, and they can be grooved for a flush-mount rim.
- Laminate: Blanco points a laminate top to a drop-in, because that top cannot take a clean polished edge around the opening.
- Solid surface: A dual-mount rim can fasten to the underside, and the same flat rim can also drop in from above.
- Tile: Blanco’s dual-mount note treats tile the way it treats laminate, and uses the flat rim as a drop-in so the rim can seal the cut.
Some laminate makers and some installers do set a bowl under a laminate top, including compact laminate built thicker than a paper-faced sheet. That is a product-specific install, with its own brackets and its own edge seal. It is not a reason to route a stone-style flush groove into particleboard, and it is not a reason to skip the sheet that came with the sink.
Order the sink and the slab as one conversation. A stone shop that cuts from a generic template, before your reveal is written down, locks you into the ledge on that template. If the sink shows up after the hole exists, the reveal is whatever the shop guessed.
Farmhouse Aprons and Dual Mount Rims
A Farmhouse Sink With a Finished Front
A farmhouse sink, also called an apron-front or a farmer’s sink, keeps a finished panel on the face of the cabinet. You stand closer to the bowl and reach in with less lean over a counter nose. Blanco says most farmhouse sinks are a custom undermount, and the only reliable spec is the sheet for that exact model.
The VINTERA line is built so one sink can go in both ways. As a flush mount it leaves a band of sink color level with the counter. As an undermount it clips up under the stone. Blanco’s VINTERA farmhouse announcement also sizes the sink to a stock base cabinet of the same width, which skips the custom box many apron sinks still demand.
| VINTERA detail | What Blanco publishes |
|---|---|
| Models | A 30 inch super single and a 33 inch equal double |
| Apron | 6 1/2 inches on the face |
| Bowl depth | 9 inches |
| Cabinet | A standard base the same width as the sink |
The front of an apron has to be fastened into the cabinet, not left hanging on the counter joint alone. Apron install sheets warn that skipping that fastening can damage the sink. Read the fastener layout on the model you bought before the cabinet face is cut away, because the panel and the bowl move together once the sink is full of water.
A Dual Mount Rim on Two Kinds of Counter
A dual-mount sink is one bowl with an ultra-flat rim that can drop in or go under. On tile or laminate, the flat rim seals the hole and stays low enough that a sponge can push crumbs into the bowl. Under a solid-surface top, the top face of that rim fastens to the underside of the counter.
WHEN ONE RIM HAS TO DO BOTH JOBS
Ask which way that exact model is rated before you order the counter. A flat rim belongs to that sink, and it does not mean every top in the kitchen can take both installs.
The low rim is why a dual mount wipes more like a shallow curb than a classic drop-in. The height is still a rim sitting on the counter or under it. It is not a groove routed so the rim and the stone share one plane. If that shared plane is the look you want, ask for a flush-mount model rather than a dual mount described as nearly level.
Crumbs and Water at the Caulk Line
Once the sink is in, the edge you chose is the path the sponge takes every night. On a drop-in, the raised rim is a curb. Crumbs stop against it, and the caulk line sits in the open on the counter face, where soap and food stain it. On an undermount with the default ledge, you wipe stone onto that narrow rim and then into the bowl, which is why the template calls the ledge easy to clean.
A zero reveal takes the ledge away, so the wipe runs off the stone and into the bowl in one motion. A negative reveal hoods the rim with stone, which sheds water inward and also covers the caulk, so the joint you are trusting is out of sight. A flush mount that is filled level is one plane under the sponge. A rim left proud of the stone, or a joint left wide, collects the grit the groove was cut to close.
The caulk on a drop-in is on the counter face, in the path of every wipe. The caulk on an undermount sits at the rim under the stone. The caulk on a flush mount is the filled joint at the rim, which stays clean only while that joint is actually level with both surfaces.
Before Anyone Cuts the Counter
Once the stone is cut, the reveal is fixed, and a wrong opening is a new top or a careful recut that may not be possible. Blanco prints its templates as a guide only. The sheet says setting the real sink on the counter gives a truer outline than the paper, and small differences on the drawing are not something the maker accepts. You, the fabricator, or the installer has to own that fit in writing.
WHAT TO WRITE ON THE WORK ORDER
- The mount: Name flush mount, undermount, or drop-in, in those words.
- The reveal: For an undermount, write 1/8 inch positive, zero, or negative.
- The accessories: Any cutting board, grid, or colander has to clear the reveal you chose.
- The deck: Leave room behind the bowl for the faucet and a soap pump, which Blanco flags on its installation page.
- The holes: Knock extra faucet holes in the sink before it is set in silicone, because the template says a drill through a bedded bowl can crack it and void the warranty.
Set the sink on the cabinet before the cut, and check the drawers, the dishwasher, and the backsplash. A reveal that looks right on paper and blocks the faucet swing is still a bad opening. Clips go on in the order the template numbers, so one side is not cranked down before the bowl is centered. Where the instructions list wood braces under the sink, those braces are part of the install.
Frequently Asked Questions
Can You Change the Reveal After the Stone Is Cut?
The reveal is the cut itself. Moving from a 1/8 inch positive reveal to a negative reveal means taking more stone away, and a hole that is already too wide cannot grow stone back. A wrong opening means a new layout or a new top, so the reveal belongs on the order before the saw starts.
How Soon Can You Run Water After the Sink Is Set?
Follow the cure time printed on the sealant tube you used, and treat 24 hours as the wait written on Kohler’s flush-mount sheet. Water on a joint that is still soft can open a path under the rim before the seal has taken hold.
Does a Flush Mount Sink Need a New Cabinet?
The groove for a flush-mount rim is cut in the counter, not in the cabinet box, so a standard bowl does not need a new cabinet just to sit level. An apron-front sink is the style that changes the cabinet face, and some models are sized to a stock base of the same width as the sink.
Is a Top-Mount the Same as a Flush Mount?
A top-mount, also called a drop-in, hangs from a rim that sits above the counter and seals on the top face. A flush mount finishes level with that face. A photo with a metal lip resting on laminate is a drop-in, even when the listing title says flush.
Write the mount and the reveal on the work order in ordinary words: rim level with the counter, stone edge 1/8 inch back from the bowl, or stone lapping the rim. The shop can price the groove from that line, and you can hold the cutting board over the drawing before the slab is cut.

Greed Held After a $697 Million Crypto Long Flush

Fed Minutes Keep a Year-End Rate Hike Alive

A Nanny-Cam Tape Follows Tyreek Hill Into Free Agency

Star Wars Galactic Racer Makes a Crash End the Tour

Amazon Puts Apple’s June MacBook Prices Back on Sale

Sophia Wootten Turns the Miss Georgia Crown Toward Cleft Care

Georgia Beach Bacteria List Leaves Swim Areas Open

The iPhone 16 Pro Flipkart Cut Did Not Last

IXI Autofocus Glasses Still Lack a European CE Mark

UltraTech’s Ultravolt Launch Puts Cable Multiples on Trial
-
 ENTERTAINMENT5 months ago
Sophia Wootten Turns the Miss Georgia Crown Toward Cleft Care
-
 NEWS5 months ago
Georgia Beach Bacteria List Leaves Swim Areas Open
-
 NEWS10 months ago
IXI Autofocus Glasses Still Lack a European CE Mark
-
 NEWS1 year ago
The iPhone 16 Pro Flipkart Cut Did Not Last
-
 BUSINESS2 months ago
UltraTech’s Ultravolt Launch Puts Cable Multiples on Trial
-

 NEWS4 months ago
Little St. Simons Island Hatches Loggerheads at 72.4 Percent
-

 NEWS2 months ago
Microsoft Prints Azure’s $29.42 Billion Quarter and Shrinks the Map
-

 NEWS1 year ago
Capyfriends Cafe Routes Helen Tourists to Cleveland Capybaras