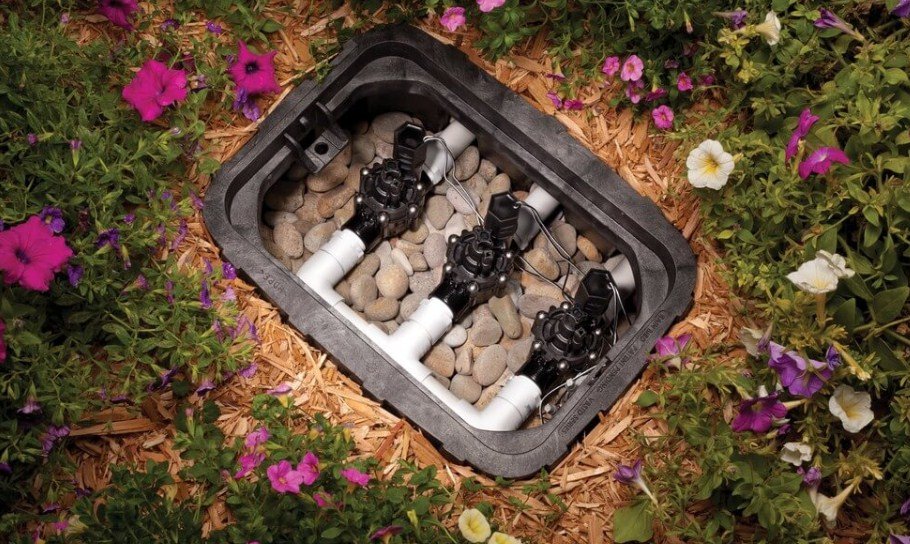
Raising a sprinkler valve box can be a daunting task, especially if you’re not a professional. But don’t worry, with the right guidance, you can get it done efficiently and effectively. In this post, we’ll break down the process into concise steps, so you can successfully raise your sprinkler valve box on the first try. From determining the right size to filling in the remaining space, we’ll walk you through each step to ensure a seamless process.
Key Takeaways:
- Measure and Match Size: Ensure the new sprinkler valve box is compatible with the old one in terms of size. Measure the height and depth needed to choose the right valve box.
- Dig Safely and Cautiously: Dig around the old box, watching out for the perimeter, and dig more than needed to create space for the new box. Avoid digging wider than 2 inches to prevent unnecessary trouble.
- Provide Support and Fill Space: Set the new valve box on top of the old one, ensuring the flanges are supportive. If not, use filler materials like bricks, stones, or concrete pieces. Finally, fill the remaining space around the edges with soil.
How To Raise Sprinkler Valve Box?
A crucial step in raising a sprinkler valve box is preparation. You need to ensure that you have everything in place before starting the project. This includes choosing the right valve box, preparing the site, and considering various factors that can affect the outcome.
Match the Size
Sizing up the situation is critical. You need to determine how much the new sprinkler valve box is compatible with the old ones in size. If they’re the same size, you’re in luck. But if not, you’ll need to adjust the new one to fit on top of the old one.
Dig Down the Old Box:
Little do people know that digging down the old valve box can be a hazardous task if not done correctly. You need to be cautious of the perimeter and dig safely to avoid damaging any underground pipes or wires.
Take Off the Lid
You’ll need to remove the lid of the old valve box to access the interior and ensure a perfect fit for the new valve box. This is a crucial step, as the lid needs to fit perfectly on the new valve box.
Setting the New Valve Box
While setting the new valve box on top of the old one, consider the flanges and support they provide. The flanges need to be supportive enough to hold the weight of the new valve box.
A well-supported flange is necessary to prevent the valve box from sinking or becoming misaligned. If the flanges are not supportive enough, you may need to add filler materials, such as bricks, stones, or concrete pieces, to provide additional support.
Filling the Gap
The gap between the old and new valve boxes needs to be filled with filler materials to ensure a secure installation. This will prevent any movement or shifting of the new valve box.
Flanges play a critical role in providing support to the valve box. By filling the gap with filler materials, you can ensure that the flanges are securely in place, providing a stable base for the new valve box.
Summing up
Ultimately, raising a sprinkler valve box requires attention to detail and careful planning. By following these five steps – matching the size, digging down the old box, taking off the lid, setting the new one on top, and filling the rest of the space – you can successfully raise your sprinkler valve box. Remember to measure carefully, dig safely, and use filler materials as needed to ensure a secure and level installation. With these steps, you’ll be able to complete the job efficiently and effectively.
FAQ
Q: What is the first step in raising a sprinkler valve box?
A: The first step in raising a sprinkler valve box is to match the size of the new valve box with the old one. Measure the height and depth of the old box and ensure the new one is compatible. If they are not the same size, you may need to place the new box on top of the old one until it fits.
Q: How do I prepare the old valve box for the new one?
A: To prepare the old valve box, you need to dig around it carefully, making sure to stay within a 2-inch perimeter. Remove the lid of the old box to access the interior and ensure the new lid fits perfectly. Set the new valve box on top of the old one, taking care to support the flanges with filler material if necessary.
Q: What do I do after setting the new valve box in place?
A: After setting the new valve box in place, fill the remaining space around the edges with soil. If you have excess soil, use a wheelbarrow to remove it. Ensure the new valve box is sitting securely on top of the old one, and the lid is properly aligned. This completes the process of raising your sprinkler valve box.

