When it comes to home entertainment, having a high-quality audio system is just as important as having a great display. As an experienced audio enthusiast, I know that combining a Yamaha receiver with a smart TV can provide you with the ultimate cinematic experience. With this guide, you’ll learn how to seamlessly integrate these two devices and unlock their full potential.
Are you wondering how to hook up your Yamaha receiver to your smart TV? The key is to choose the right connection method and follow the proper steps to ensure both devices work together harmoniously. By following this comprehensive guide, you’ll not only understand the various connection options available but also how to configure your smart TV and Yamaha receiver for the best audio experience. So, let’s dive in and start enjoying your home entertainment setup like never before!
What You Need to Know About Yamaha Receivers and Smart TVs
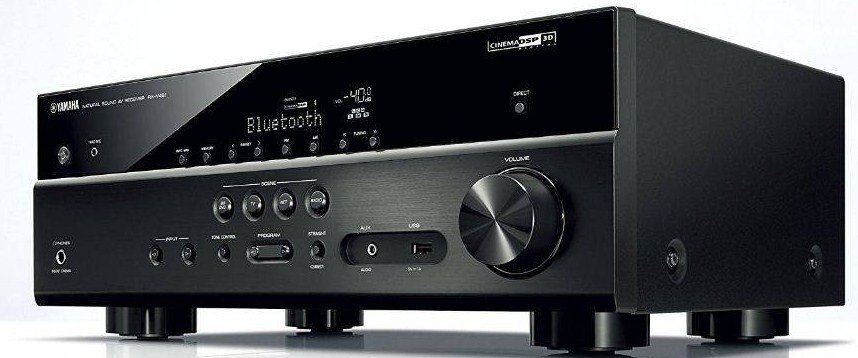
Yamaha receivers are renowned for their high-quality audio performance and versatility, making them a popular choice among audiophiles. These devices serve as the central hub for your home entertainment system, allowing you to connect various audio and video sources, such as Blu-ray players, gaming consoles, and streaming devices, to your speakers and TV. With a plethora of features, including surround sound capabilities and advanced audio processing, Yamaha receivers can significantly enhance your listening experience.
Smart TVs, on the other hand, have become increasingly popular in recent years due to their internet connectivity and built-in streaming apps. These advanced televisions allow users to access a wide variety of content, including movies, TV shows, and music, without the need for additional devices. By connecting a Yamaha receiver to your smart TV, you can take advantage of both the receiver’s audio prowess and the smart TV’s convenience and functionality.
Recent statistics show that smart TVs now account for approximately 70% of all television sales worldwide. As these devices continue to grow in popularity, it’s essential to understand how to optimize their audio capabilities by integrating them with a high-quality Yamaha receiver. In the following sections, we’ll explore the different connection methods and guide you through the process of setting up your Yamaha receiver and smart TV for the ultimate home entertainment experience.
Choosing the Right Connection Method for Your Setup
When connecting a Yamaha receiver to your smart TV, it’s essential to choose the right method that ensures optimal audio and video quality. There are two primary connection methods you can use – HDMI (High Definition Multimedia Interface) and Optical Audio (also known as TOSLINK or S/PDIF). Each method has its benefits and drawbacks, so understanding their differences will help you make an informed decision based on your specific needs and equipment.
HDMI is the most common and recommended method for connecting a Yamaha receiver to a smart TV. This single cable transmits both high-definition video and multi-channel audio signals, simplifying the setup process and reducing cable clutter. Additionally, HDMI supports Audio Return Channel (ARC) and Consumer Electronics Control (CEC), which allows for seamless control of multiple devices using a single remote.
Optical Audio, on the other hand, solely transmits digital audio signals between devices. While this method also provides high-quality audio, it does not support video transmission, ARC, or CEC. As a result, you’ll need separate cables for video signal transmission and may have limited control options when using an optical audio connection.
In summary, while both HDMI and Optical Audio connections can provide high-quality audio, HDMI is typically the preferred method due to its additional features and simplicity. However, if your devices lack HDMI ports or ARC support, using an Optical Audio connection is still a viable option for achieving great sound quality.
Connecting Your Yamaha Receiver to Your Smart TV via HDMI
Connecting your Yamaha receiver to your smart TV using an HDMI cable is a straightforward process that ensures high-quality audio and video transmission. By following these simple steps, you’ll be able to enjoy seamless integration between your devices and take advantage of features such as Audio Return Channel (ARC) and Consumer Electronics Control (CEC).
Step 1: Locate the HDMI ports on both your Yamaha receiver and smart TV. Typically, these ports are labeled “HDMI” or may have an ARC designation if they support the Audio Return Channel feature.
Step 2: Connect one end of the HDMI cable to the HDMI output port on your Yamaha receiver, usually found on the rear panel.
Step 3: Connect the other end of the HDMI cable to an available HDMI input port on your smart TV.
Step 4: Power on both your Yamaha receiver and smart TV.
Step 5: Using your smart TV remote, navigate to the input settings menu and select the HDMI input to which you’ve connected your Yamaha receiver.
Step 6: If your devices support ARC and CEC, enable these features in their respective settings menus for seamless control and audio transmission.
In summary, connecting your Yamaha receiver to your smart TV via HDMI is a hassle-free method that provides high-quality audio and video transmission while simplifying device control. By following these steps, you’ll be well on your way to enjoying your home entertainment system’s full potential.
Setting Up Your Yamaha Receiver with an Optical Cable
While HDMI is the preferred method for connecting a Yamaha receiver to a smart TV, an optical cable can still provide high-quality audio if HDMI is not an option. By using an optical cable, you can transmit digital audio signals between your Yamaha receiver and smart TV without any loss in quality. Here’s how to set up your Yamaha receiver with an optical cable:
Step 1: Locate the optical audio output port on your smart TV and the optical audio input port on your Yamaha receiver. These ports are typically labeled “Optical,” “TOSLINK,” or “S/PDIF.”
Step 2: Insert one end of the optical cable into the optical audio output port on your smart TV, ensuring that the cable connector is properly aligned with the port.
Step 3: Connect the other end of the optical cable to the optical audio input port on your Yamaha receiver.
Step 4: Power on both your Yamaha receiver and smart TV.
Step 5: Using your Yamaha receiver’s remote control, navigate to the input settings menu and select the optical audio input corresponding to the connected cable.
By following these steps, you can successfully set up your Yamaha receiver with an optical cable connection to your smart TV. Keep in mind that this method only transmits audio signals, so you’ll need a separate cable (such as an HDMI cable) to transmit video signals between your devices.
Configuring Your Smart TV and Yamaha Receiver for the Best Audio Experience
To fully enjoy your home entertainment system, it’s essential to configure your smart TV and Yamaha receiver for optimal audio performance. By adjusting the settings on both devices, you can ensure that you’re experiencing the highest quality sound possible, tailored to your preferences and specific equipment.
One of the first steps in configuring your smart TV and Yamaha receiver is selecting the appropriate audio output format. This can typically be found in the audio settings menu of both devices. For the best audio experience, choose a format that supports multi-channel audio, such as Dolby Digital or DTS. If your devices support advanced audio formats like Dolby Atmos or DTS:X, enabling these options can provide an even more immersive listening experience.
Another crucial aspect of configuring your devices is calibrating your speaker system. Many Yamaha receivers come with a built-in calibration tool called YPAO (Yamaha Parametric Acoustic Optimizer) that helps you optimize your speakers for your specific room conditions. By following the guided setup process and using the included microphone, YPAO can automatically adjust speaker levels, distances, and equalization settings to create a well-balanced audio environment.
Finally, take some time to explore the various audio enhancement features available on both your smart TV and Yamaha receiver. These may include options such as dialogue enhancement, bass boost, and virtual surround sound. Experiment with these settings to find the combination that best suits your listening preferences and room setup.
Troubleshooting Common Connection Issues
Occasionally, you may encounter connection issues when setting up your Yamaha receiver with your smart TV. These problems can range from no audio output to intermittent sound or video disruptions. In this section, we will provide some tips and solutions for addressing these common connection issues, ensuring a seamless and enjoyable home entertainment experience.
Firstly, double-check all cable connections between your Yamaha receiver, smart TV, and other connected devices. Ensure that the HDMI or optical cables are securely plugged into the appropriate ports and not damaged. If you suspect a faulty cable, try replacing it with a new one to see if the issue is resolved.
Secondly, verify that your smart TV and Yamaha receiver are both set to the correct input sources. For instance, if you’re using an HDMI connection, ensure that your smart TV’s input settings menu reflects the proper HDMI input port. Similarly, confirm that your Yamaha receiver’s input selection corresponds to the connected device (e.g., HDMI or Optical Audio).
If you’re experiencing audio issues, such as no sound or poor audio quality, navigate to the audio settings menus on both your smart TV and Yamaha receiver. Check that the audio output format is set correctly and is compatible with your devices. Additionally, ensure that any relevant audio enhancements or processing features, such as Dolby Digital or DTS, are enabled.
Lastly, if you continue to experience connection issues, consider performing a factory reset on both your smart TV and Yamaha receiver. This will revert all settings back to their default state, allowing you to reconfigure your devices from scratch. Keep in mind that this process will erase any custom settings or presets, so proceed with caution.
By following these troubleshooting tips, you can effectively diagnose and resolve common connection issues between your Yamaha receiver and smart TV, ensuring a smooth and enjoyable home entertainment experience.
Enjoying the Benefits of a Yamaha Receiver and Smart TV Combo
Combining a Yamaha receiver with a smart TV provides the ultimate home entertainment experience by enhancing both the audio and video quality. This powerful duo allows you to enjoy your favorite movies, TV shows, and music with superior sound and picture clarity. Moreover, the seamless integration and advanced features offered by these devices make it incredibly easy to manage and control your home theater system.
By connecting your Yamaha receiver to a smart TV, you can take advantage of surround sound capabilities, advanced audio processing, and built-in streaming apps, all without needing additional equipment. This means you can enjoy an immersive, cinema-like experience right in the comfort of your own home. Furthermore, the convenience of controlling multiple devices with a single remote simplifies your setup and eliminates the need for multiple remotes.
In conclusion, investing in a Yamaha receiver and smart TV combo not only elevates your home entertainment experience but also provides a user-friendly solution for managing your devices. By following the setup and configuration tips discussed in this article, you’ll be well on your way to enjoying the numerous benefits that this powerful combination has to offer.
Conclusion:
In summary, setting up and configuring a Yamaha receiver with your smart TV can significantly enhance your home entertainment experience. By following the provided guidelines and troubleshooting tips, you can easily connect your devices and optimize their performance, allowing you to enjoy high-quality audio and video content. With this powerful combo at your disposal, you can look forward to countless hours of immersive entertainment, bringing a smile to your face every time you sit down to enjoy your favorite shows or movies.
FAQ:
Q1: What is the best method for connecting a Yamaha receiver to a smart TV? A1: The recommended method for connecting a Yamaha receiver to a smart TV is using an HDMI cable, as it supports both high-definition video and multi-channel audio transmission, as well as features like Audio Return Channel (ARC) and Consumer Electronics Control (CEC).
Q2: Can I use an optical cable to connect my Yamaha receiver to my smart TV? A2: Yes, you can use an optical cable to transmit digital audio signals between your Yamaha receiver and smart TV. However, keep in mind that this method does not support video transmission, ARC, or CEC.
Q3: How do I configure my smart TV and Yamaha receiver for optimal audio quality? A3: To achieve optimal audio quality, select an appropriate audio output format (such as Dolby Digital or DTS) in both devices’ audio settings menus, calibrate your speaker system using tools like YPAO, and experiment with various audio enhancement features.
Q4: What should I do if there is no audio output or I’m experiencing connection issues? A4: First, double-check all cable connections and input sources on both devices. If the issue persists, verify that the audio output format is set correctly, and consider performing a factory reset on your smart TV and Yamaha receiver.
Q5: What are the benefits of using a Yamaha receiver with a smart TV? A5: A Yamaha receiver and smart TV combo offer numerous benefits, including enhanced sound quality, advanced audio processing, built-in streaming apps, and seamless control of multiple devices using a single remote. This combination provides an immersive and user-friendly home entertainment experience.
Q6: Can I use my smart TV remote to control my Yamaha receiver? A6: If your smart TV and Yamaha receiver both support HDMI-CEC (Consumer Electronics Control), you can use your smart TV remote to control your Yamaha receiver and other connected devices through a single remote. Be sure to enable CEC in both devices’ settings menus.
Q7: How do I calibrate my speaker system for optimal performance? A7: Many Yamaha receivers come with a built-in calibration tool called YPAO (Yamaha Parametric Acoustic Optimizer) that helps you optimize your speakers for your specific room conditions. Follow the guided setup process and use the included microphone to automatically adjust speaker levels, distances, and equalization settings.